Wednesday 30 September 2015

Mast step redesign

After some good advice I've rebuilt the mast step with a number of improvements. Previously it was too far back, it sagged to leeward as the top lashing stretched, and the step at the bottom broke (mostly due to a poor glue joint).

To fix the sagging lashing, I've built a solid mast partner that sits just under the forward beam. This also moves the mast forward to just in front of the beam. This is a far forward as the mast can go, without cutting a hole in the deck and losing the forward buoyancy tank.

I've moved the mast step to the bottom of the hull. This gives the step more leverage and reduces the loads. I wasn't sure that moving the mast forward 6" would be enough, so at the moment it's only temporary - it's not painted and only held in place with screws. Also the 'keeper' block that holds the bottom of the mast in place can be moved to adjust the mast rake. In the photo there's a bit of forward rake. If this wasn't enough I'd have to have a major rethink.


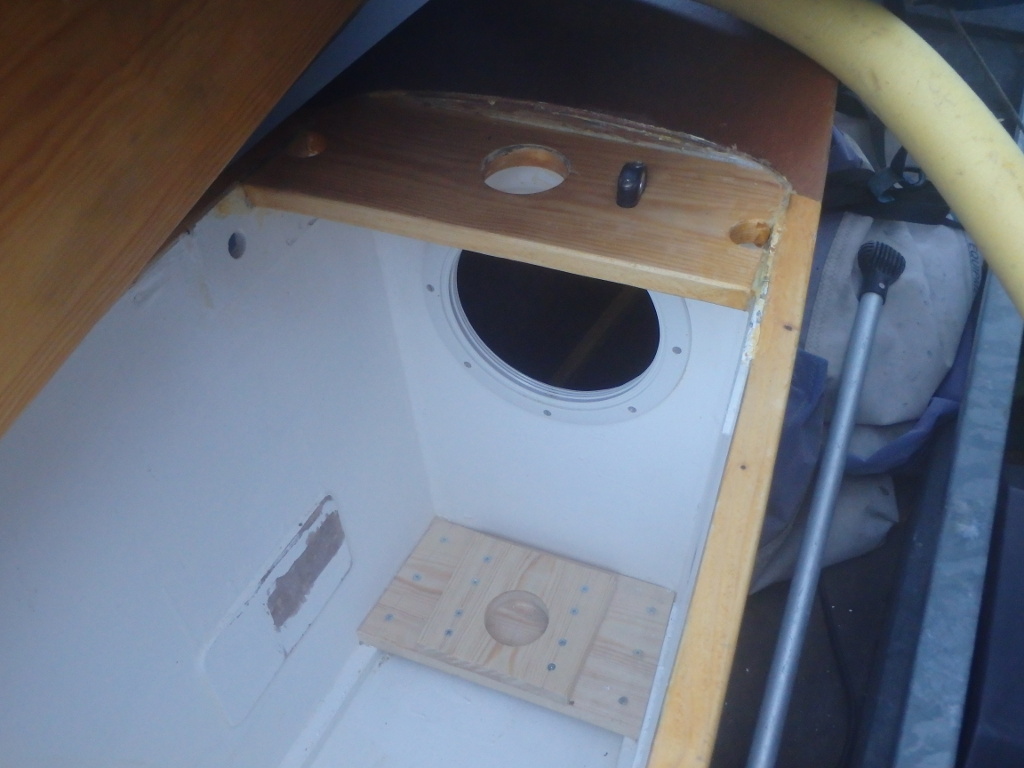
In the photo you can also see where the old mast step was, the holes in the mast partner for the beam lashing, and a plastic fitting to take the down-haul and secure the rig to the boat. The mast only has to lift an inch to come out of the mast step, so I want it held in firmly.

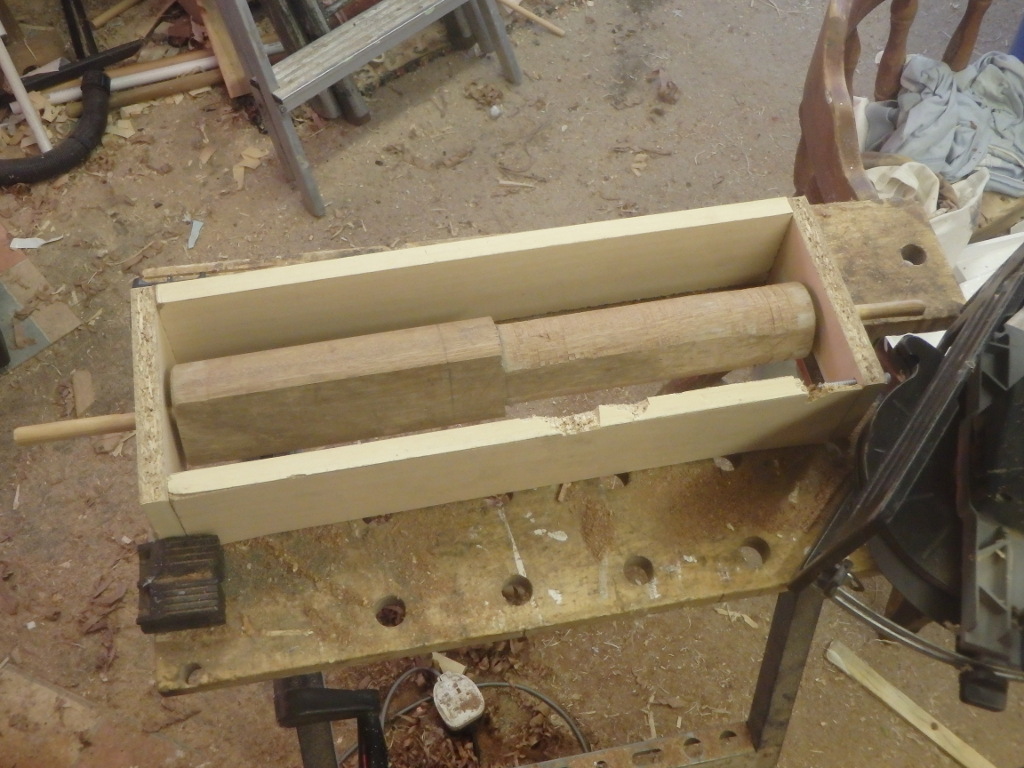
Lowering the mast step brought the boom unacceptably low, so I've extended the mast with a short piece of wood that fits inside the laser mast (Thanks to Rob Zabukovec for that idea!). Unfortunately I sold my lathe a couple of months ago, after not using it for years, so I made this box with pins to support the wood and shaped it with a circular saw - fine except when the blade snagged the edge of the box!
We tried all this at the weekend, and it's a huge improvement. We had a good force 4 and nothing broke, despite flying the ama at times and turning it into a submarine on the other tack. Best of all the weather-helm had gone - in fact there was a small amount of lee-helm, so I can reduce the mast rake.

Another innovation this time was adding a 3 meter long 110mm diameter drain pipe as a safety ama. I calculated that it's only 30liters of buoyancy, and when I tested it in the shallows it submerged pretty easily. However, once the water reached my waist the boat stabilised with the gunnel just out of the water, and once I stopped trying to tip it, it self-righted. I think it would stop us turning turtle but I'm not sure it'll always save us. And it looks ugly!

Tuesday 4 August 2015

Mast step failure

I need to rethink my mast step - or work out what I did wrong the first time. Here's a photo looking down into the boat at what's left of the mast step. There used to be a square block with a hole in the middle, where the paint is missing. It came unstuck, the two 12mm belaying pins held it all together for a surprising length of time, and then the block split.

Here's the remains of the glue joint, it looks like the wood had been coated in wax or oil because the epoxy hadn't stuck very well.

Lashing the mast to the beam wasn't really satisfactory either, as the lashing stretched the mast would lean to leeward, and I think that added to the forces turning the boat into the wind. I plan to make a solid mast partner, glued to the forward bulkhead, and extend the mast about 6" so I can move the mast foot down to the chine battens.

Sunday 2 August 2015

Sailing at last!

This was actually our second outing, as we forgot the camera the first time. We're using a laser rig, with the mast lashed to the forward beam and the foot of the mast resting on a step about halfway up the hull. There's no rudder yet, so we're relying on a paddle and moving our weight around to steer. It's not quite balanced like this, the rig is a little far forward which is why we're all sitting at the back. Even so, with three of us on board we were matching the lasers, and it only needed one of us to sit on the hiking bench for balance.

We took a friend and his children out briefly, the extra weight didn't seem to make much difference, although it's getting pretty low in the water.

Saturday 25 July 2015

Painting and trial assembly

I've spent the last couple of weeks painting, initially very slowly with a brush and then much faster with a small foam roller. The white is ordinary exterior gloss, and seems very soft at the moment. The wood colour is International Woodskin - a wood stain with a slight gloss finish. I've not yet done the full three coats but where I have I can see that each coat looks shinier than the last.

I'm very happy that I was persuaded not to just paint it all white, I love how it looks.

Here are all the pieces before and after assembly.


Doing up the bolts on the ama is fiddly and slow. The main hull isn't so bad but the rocker means that they don't naturally line up and I needed a helper to lift one bow.

Oh, there's also a trolley made from a cut down Optimist trolley. The kids had a lot of fun pushing each other around on it!

Friday 3 July 2015

Laminating the beams

Many thanks to Mr W. the Design and Technology teacher at the girl's secondary school, who helped me saw two very large straight beams into a pile of long bendy strips - now I'm gluing the strips back together in a (hopefully) graceful curve. These will link the main hull to the float.

Everything else is this build has been fair easy for an amateur builder, but sawing three inch thick planks requires more than hand-tools!

Work is still going very slowly due to family pressures, and the start of the sailing season, but we have managed to replace the foredeck and patch another rotten hole in the hull of our Miracle dinghy and give it a coat of paint and varnish so it's looking better than I've ever seen it before. Kathy and I even got to sail it last week.

Sunday 12 April 2015

Ama, decks and a start to fibre glassing


It's been a while since I wrote anything, work has slowed down due to family commitments but I have managed to finish most of the wood work (just the beams and foils to go). Here are the two parts of the ama (float), with the edges sealed with epoxy - it's amazing how much soaks into the end grain of this plywood.

I've sealed the inside the watertight compartments with a layer of epoxy, after an enquiry on ProaForum was answered by the designer suggesting this method. I had delayed fitting the decks because I wasn't sure what to do and didn't want them to rot as badly as our old Miracle did. Now the decks and seats are on, it looks a lot more like a boat.
Here's another step I had been delaying - my first attempt at covering ply with glass cloth and epoxy. It wasn't as nearly bad as I had expected, the cloth stuck easily to the wood, didn't pull out of shape and I didn't have much trouble with air bubbles.

Sunday 1 February 2015

Stems, seats and starting the Ama

I've added the external stems and shaped them into satisfying curves, and filled in the fiddly gap where the gunnel meets the stem. Both hulls now have a base panel, with nice rounded edges and nails punched so they're no longer proud of the surface.


Seats and supports at the blunt end of each hull.

Starting work on the Ama. There are eight long strips of ply and eight chine strips - this would go faster if I had more clamps and more space, or if it was warmer and the epoxy took less than 24 hours to set.

Sunday 18 January 2015

Building Gary Dierking's Wa'apa in Sussex


I'm building Gary Dierking's Wa'apa outrigger sailing canoe from the plans in his book. The best thing about this design is that it is made in sections that fit in my garage!

Bulkheads and sides cut out

Framing the bulkheads

Trial assembly of the pieces, and checking to see if our girls fit

Learning to use a plane

Two boat shaped pieces